Step by step guide
How to add your camera or NVR
Surveillant works with the cameras and recorders you already run. It reads the video stream your camera or NVR produces, so there is no new hardware and nothing to install on site. This guide takes you from finding the stream address to a camera that shows Monitoring in your account.
In this guide
- 1. Check which stream your camera offers
- 2. Build the RTSP address for your brand
- 3. Confirm the address before you add it
- 4. Make the stream reachable from the internet, safely
- 5. Add the camera in Surveillant
- 6. Connecting an NVR: one channel, one camera
- 7. Test the connection
- 8. Read the camera status
-
1
Check which stream your camera offers
Surveillant accepts three kinds of source. RTSP is offered by almost every IP camera and NVR and is the most common choice. HLS is a web stream whose address ends in .m3u8, often produced by cloud recorders and streaming gateways. ONVIF lets you enter the camera host and port instead of a full address. If you are unsure, start with RTSP: the camera manual or its web admin page usually lists it under Network, RTSP or Streaming.
-
2
Build the RTSP address for your brand
An RTSP address has the form rtsp://username:password@host:554/path. The host is the public IP address or hostname of the site, 554 is the default RTSP port, and the path depends on the manufacturer. Use the main stream for the best detection quality. If the password contains special characters, write them URL encoded, for example @ as %40.
Brand Address format Notes Hikvision rtsp://user:pass@host:554/Streaming/Channels/101101 is channel 1 main stream, 102 its substream, 201 channel 2 Dahua rtsp://user:pass@host:554/cam/realmonitor?channel=1&subtype=0subtype=0 main stream, subtype=1 substream Axis rtsp://user:pass@host:554/axis-media/media.ampadd ?camera=2 for the second view of a multi sensor camera Reolink rtsp://user:pass@host:554/h264Preview_01_mainh265Preview_01_main on H.265 models, _sub for the substream Uniview rtsp://user:pass@host:554/unicast/c1/s0/livec1 is channel 1, s0 main stream, s1 substream Amcrest rtsp://user:pass@host:554/cam/realmonitor?channel=1&subtype=0same format as Dahua HLS source https://example.com/live/stream.m3u8paste the full https address as it is -
3
Confirm the address before you add it
Open VLC media player, choose Media, then Open Network Stream, paste the address and press Play. If VLC shows the picture from a computer outside your network (a phone on mobile data works well), Surveillant can read it too. If you do not know the path, ONVIF Device Manager (free, Windows) discovers ONVIF cameras on your network and shows their stream addresses.
-
4
Make the stream reachable from the internet, safely
An address such as 192.168.1.50 only works inside your own network. On the site router, forward a TCP port (554 or any free port you choose) to the internal IP of the camera or NVR. Use a static public IP from your provider, or a free DDNS hostname if the IP changes. Create a separate user on the camera with view only rights and a long unique password, do not reuse the admin account, and if your router supports it, allow the forwarded port only from the addresses you trust.
-
5
Add the camera in Surveillant
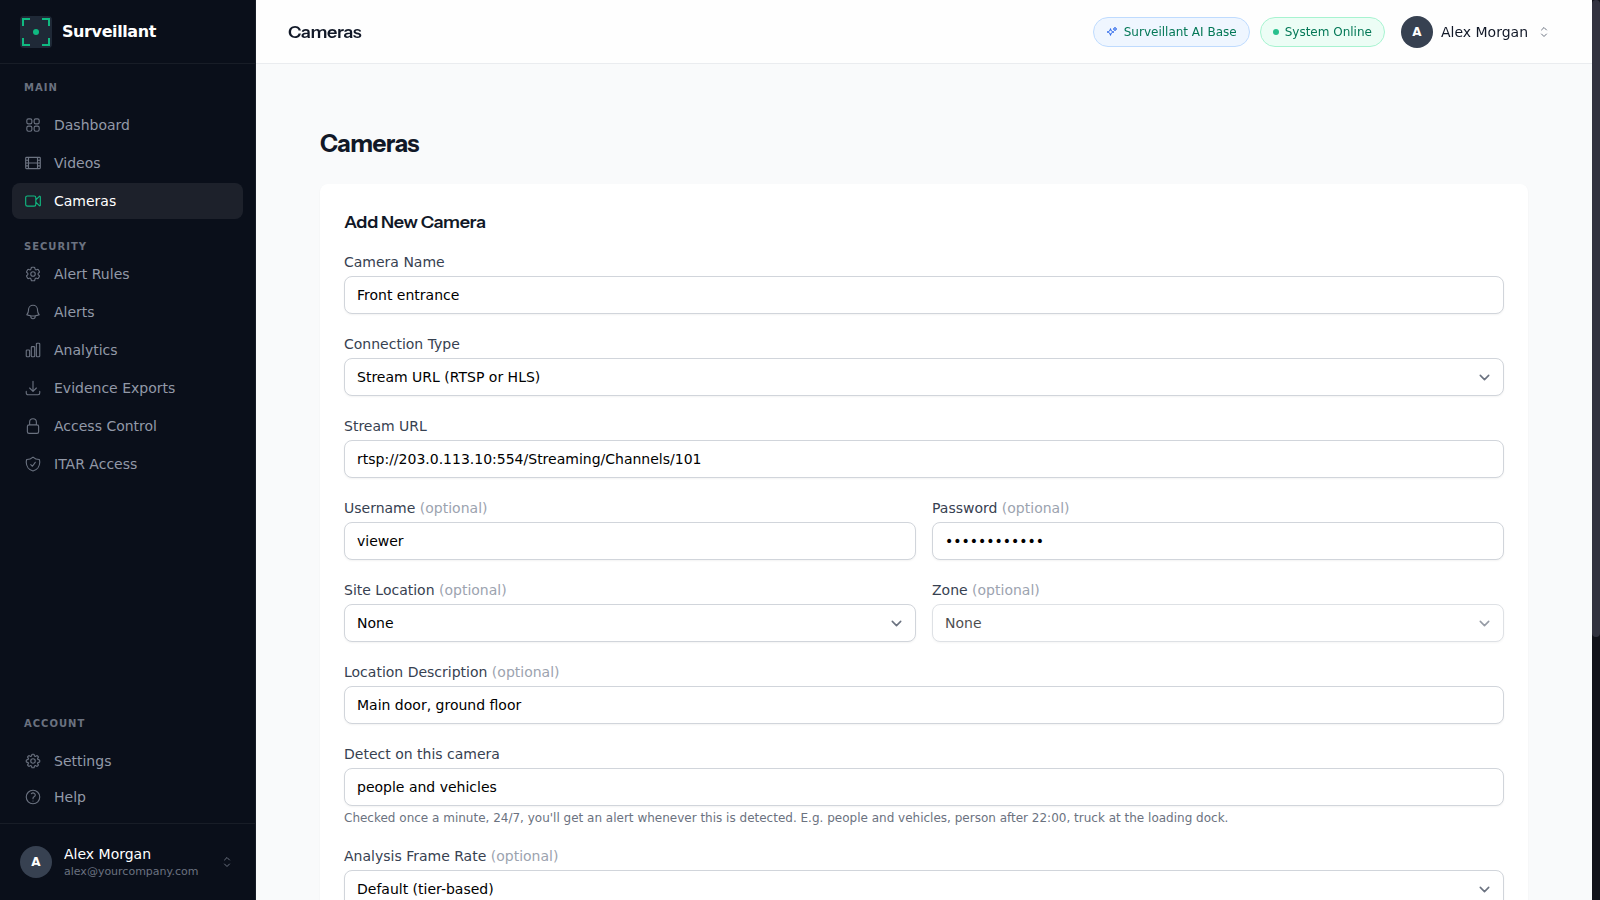
Sign in and open Cameras, then click Add Camera. Give the camera a name you will recognise, choose RTSP and paste the stream address (an rtsp:// or https://...m3u8 address both go in this field), or choose ONVIF and enter the host and port. Optionally set a location and a detection prompt such as "people and vehicles", then save. Adding many cameras at once? Use Import on the same page with the CSV template.
-
6
Connecting an NVR: one channel, one camera
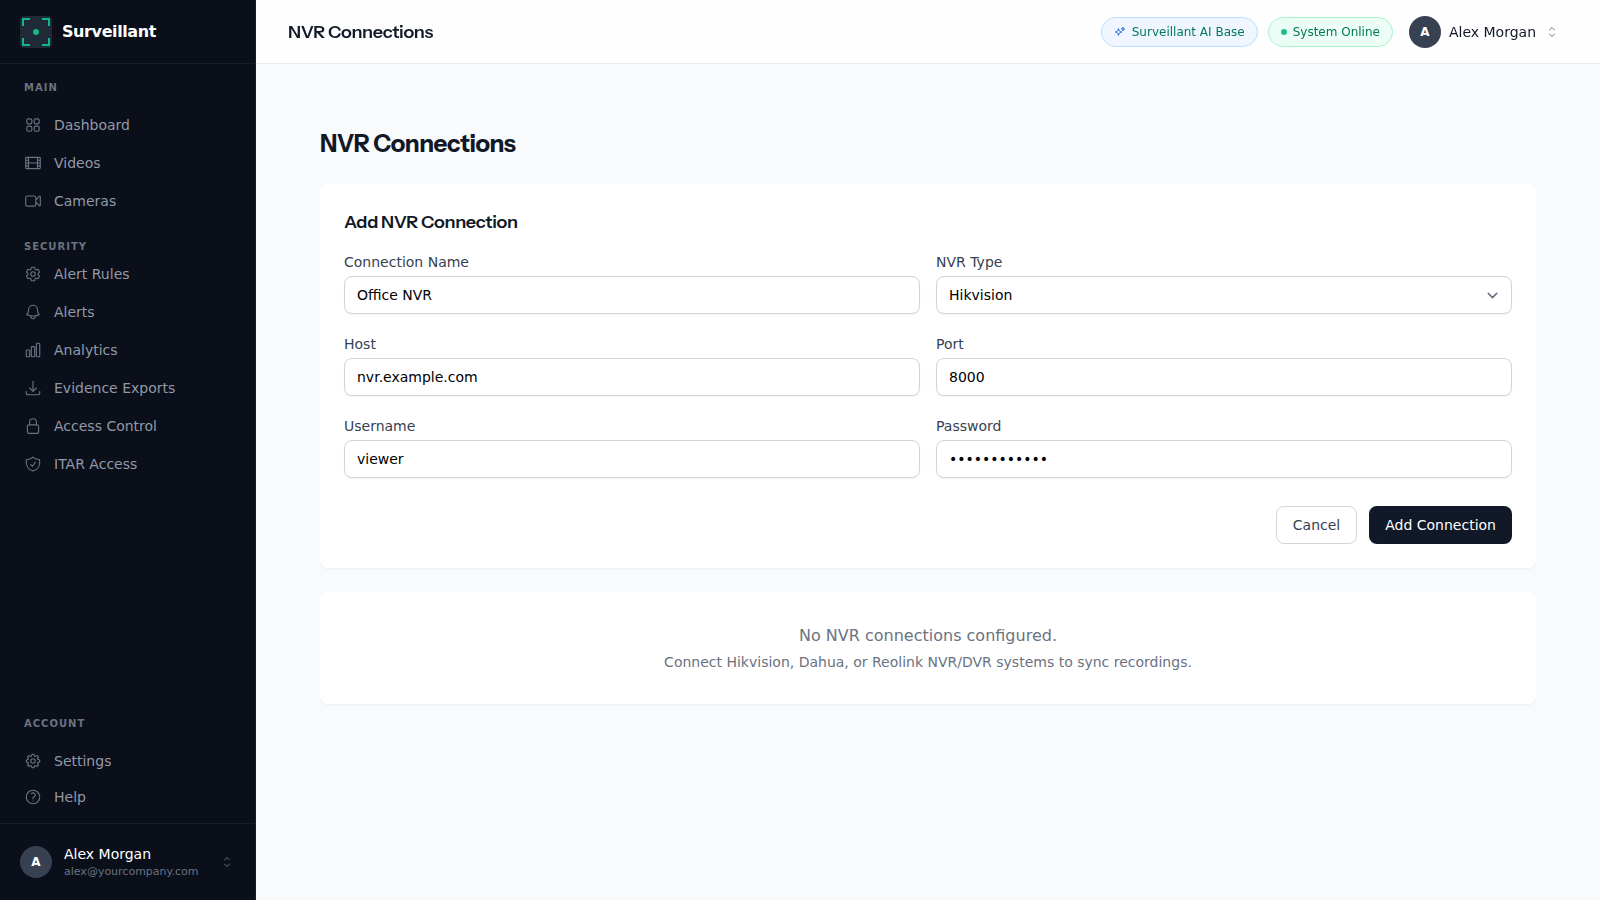
An NVR serves each connected camera as its own channel, and each channel is added as one camera with its own address: on Hikvision change 101 to 201, 301 and so on, on Dahua and Amcrest change channel=1 to channel=2 and up. Each channel counts as one camera on your plan. You can also save the recorder itself under NVR connections (Hikvision, Dahua and Reolink) and press Test to confirm the recorder answers with your credentials.
-
7
Test the connection
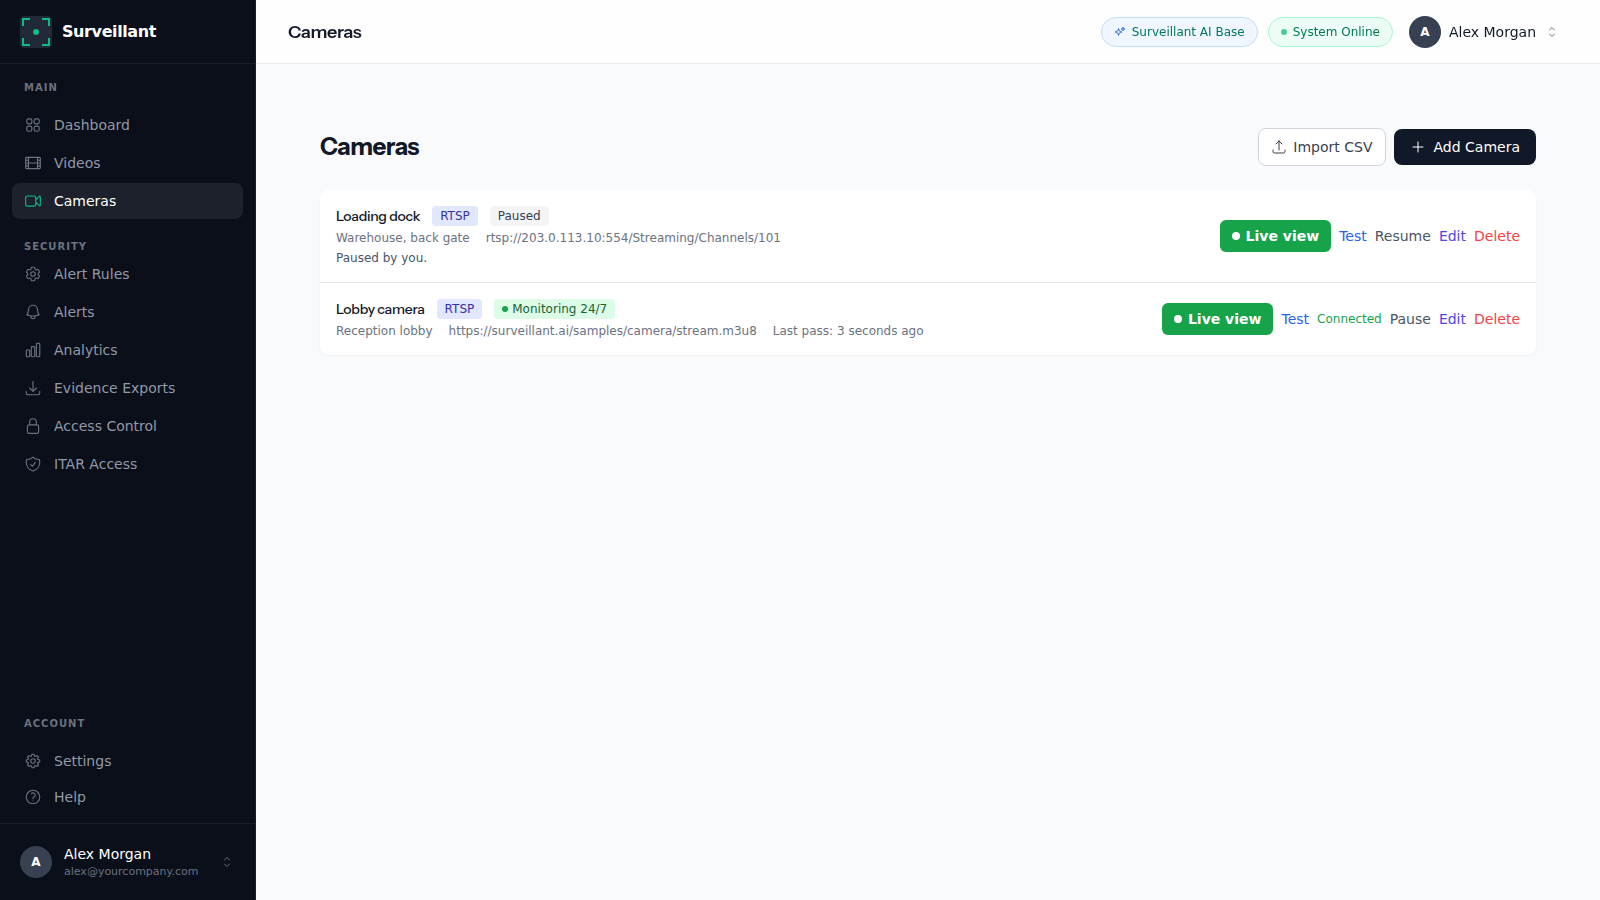
In the camera list click Test next to the camera. Surveillant tries to read the stream and shows Connected or Failed within a few seconds. Failed almost always means the address is private, the port is not forwarded, or the path or password is wrong: check it again in VLC from outside your network.
-
8
Read the camera status
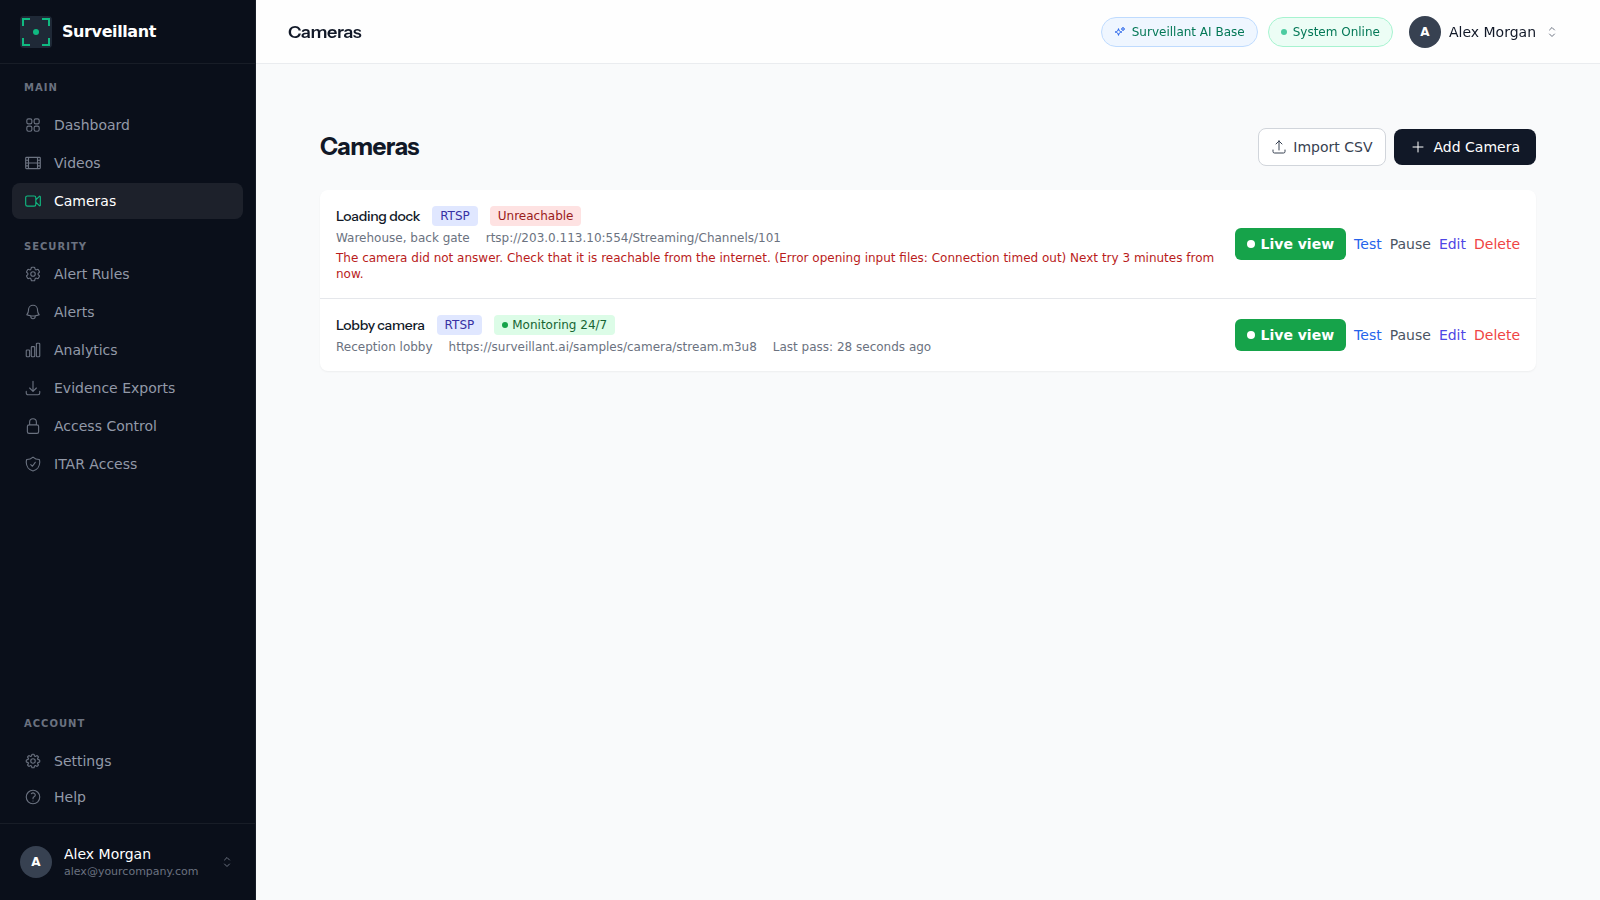
Every camera in the list shows its status. Monitoring 24/7 means the stream is read and analysed around the clock. Unreachable means the last attempt to read the stream failed; Surveillant keeps retrying automatically and the camera returns to Monitoring 24/7 as soon as the stream answers again, so a short power or internet cut needs no action. Paused means monitoring is stopped for that camera and nothing is analysed until it is resumed, for example when the account has more cameras than the plan covers.
More guides
How to set up monitoring and alerts
Set up 24/7 AI monitoring in Surveillant: alert rules, custom detection prompts, zones and schedules, email, webhook and Slack alerts, and scheduled reports.
How to test Surveillant and read the results
Test Surveillant on your own video or camera stream in minutes, no card. Learn to read the scene summary, detections, confidence, alerts and video search.
Answers to common questions are in the help center FAQ. Stuck on a step? Email [email protected] with the camera brand and what you see, and we reply with the exact fix.